This blog article is for those who want to get tech support (tech support generally needs administrator access) using Google Chrome Remote Desktop. Paid tools like TeamViewer automatically do this, however Google Chrome Remote Desktop is free.
NOTE: A good/very good internet is required for Chrome Remote Desktop to function correctly. If you are behind a Proxy Server firewall, Chrome Remote Desktop is not advised (instead use Microsoft Quick Support)
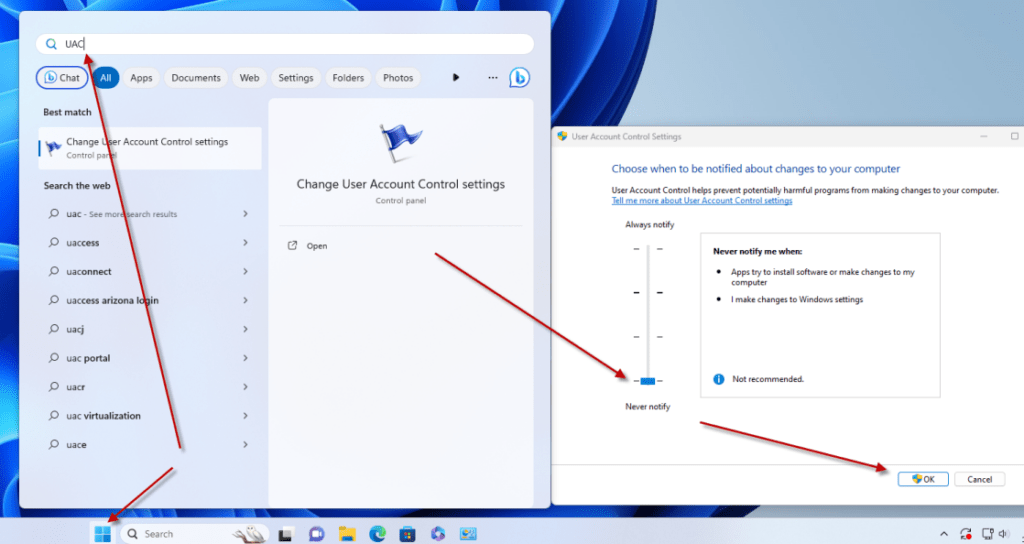
- First, Disable UAC
- Single left-click the Windows Start Menu and type “UAC”
- Double Click “Change User Account Control Settings”
- In the “User Account Control Settings” dialog, slide the control to the bottom (you will need to restore it later)
- Click OK
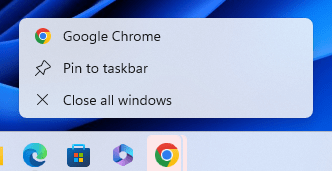
- Next, make sure Google Chrome is completely closed down
- Right click the Google Chrome icon and click “Close Window” or “Close All Windows” as shown below…
- Right click the Google Chrome icon and click “Close Window” or “Close All Windows” as shown below…
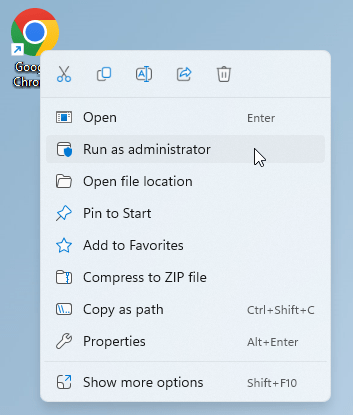
- Once Chrome is completely closed, right click your Chrome Desktop icon or the Chrome App in your Start Menu and click “Run as Administrator” as shown below – this step is very important…
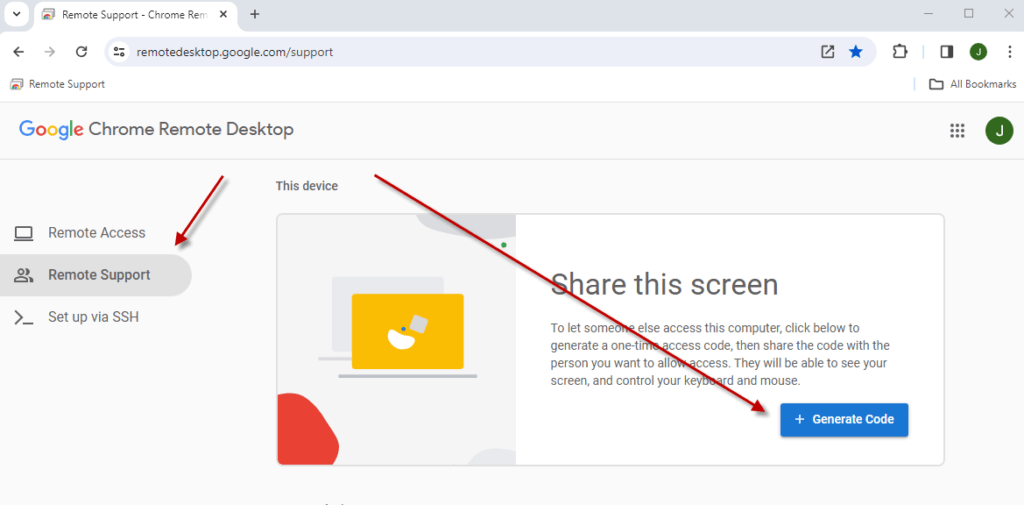
- Next, copy this URL https://remotedesktop.google.com/support and paste it into the address bar Chrome to get access to Remote Desktop
- Click “Share this Screen”, it will ask you to download the Chrome Remote Desktop App, “Accept and Install”
- Chrome will download “chromeremotedesktophost” to your Downloads folder
- Double click the downloaded “chromeremotedesktophost” program to install
- Click “Share this Screen”, it will ask you to download the Chrome Remote Desktop App, “Accept and Install”
- If where it says “Share this screen” now says “+ Generate Code”, click that button and share with you support tech, as shown below, if not proceed to step 6
- Once Chrome Remote Desktop is installed, if it’s running already, close it
- Restart it again by single left-click the Windows Start Menu and type “Chrome Remote Desktop”, right click and “Run As Administrator” – this step is very important
- Finally, click “Generate Code” and share this number with your support tech

Note: if there is anything you don’t like when the tech takes control of your screen, simply moving the mouse or accessing the keyboard will override the support tech’s access so you are completely safe.
Once you have finished your support session, you should turn on UAC again. Repeat steps 1 through 1(d) making sure to put the slider back to the 2/3 position.
Copyright 2023 (c) Longbow Software
Better than TeamViewer