Installing 64bit AutoCAD LT 2014 on Windows 7, Windows 8 and Windows 10

AutoCAD LT 2014 was not designed to run in Windows 10 (Windows 10 was released after AutoCAD LT 2014) and inevitably you will run into issues such as the infamous Ribbon crashing issue, slow startup problems, text scaling issues, etc.

You can automatically solve these problems using our Longbow Converter App, it fixes and manages the AutoCAD LT 2014 installation so that you can be up and running again… Just follow these easy instructions:

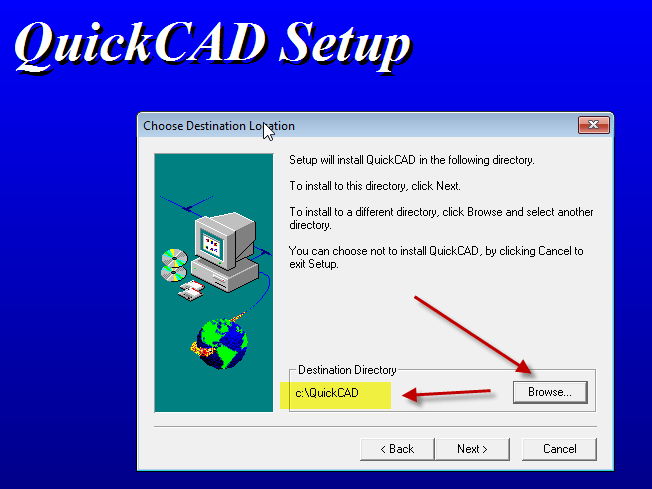
How to install 64bit AutoCAD LT 2014

  1. First, uninstall any existing AutoCAD LT 2014 installations on your computer
  2. Next, obtain the Longbow Converter App (V11.15 or higher), download here
  3. Start the Converter tool
    1. Pick the 1st tab named “AutoCAD 32bit Installer Converter
    2. Using your mouse, right-click the tab text “AutoCAD 32bit Installer Converter” so that it changes to “AutoCAD 64bit Installer Converter
    3. Next, using the “. . .  button, select your AutoCAD installation CD and follow the instructions presented by the Converter tool user interface.
  4. Once the conversion process is complete
    1. click Install/Run Setup to start setup
    2. Once you have completed the AutoCAD installation process…
      1. Completely close the setup program
      2. Go back to the Converter App and make sure it states “Success!
  5. Now you can run your AutoCAD as normal

Installing AutoCAD LT 2014 sp1

Troubleshooting

– If your AutoCAD is running really slowly, try disabling your integrated graphics card so you can run your high-performance card instead

– If you are unable to activate your product, or the activation process crashes:

– If you have crashing problems using the File->Open or File->Save dialogs inside of AutoCAD please read this blog entry on the File->Open or File->Save Crash in AutoCAD

Copyright 2020 (c) Longbow Software

Installing QuickCAD V4 on Windows 7, Windows 8 and Windows 10

Installing Autodesk QuickCAD V4 on WIndows 7, Windows 8 and Windows 10 (both 32bit and 64bit) can be very easily defined in these short steps…

  1. First, you need to purchase a copy of the Longbow Reviver tool here
  2. Using Windows Explorer, backup your entire QuickCAD V4 installation CD to your hard drive, to a folder path c:\InstallCDs\QuickCAD V4
  3. Start the Longbow Reviver tool
    1. select the 1st tab “Old Installer Reviver
    2. then using the ‘…’ button pick the  c:\InstallCDs\QuickCAD V4 folder
    3. Now click the ‘Fix and Run Old Installer’ button
    4. Read and understand all the prompts that appear, then continue by clicking OK.
      1. The tool will now start initializing the setup interface, and may take up to 45 minutes to start. Please be patient…
    5. Once the QuickCAD V4  setup appears, install as normal *except* when prompted for the installation path, set it to c:\QuickCAD e.g.

      Setting the QuickCAD installation path to c:\QuickCAD

      Setting the QuickCAD installation path to c:\QuickCAD


    6. Once the setup is complete
      1. uncheck ‘Run QuickCAD’
      2. Do not reboot if prompted to do so
  4. Now QuickCAD V4 is installed
    1. Make sure the QuickCAD V4 setup is completely closed, then in the Longbow Reviver tool…
    2. Select the 2nd tab “Old Program Reviver
    3. Using the ‘…’ button, pick the newly installed C:\QuickCAD folder
    4. next, click ‘Fix Old Program’
    5. Say ‘No’ if the Reviver tool asks if you want to re-register…
  5. Now you can happily run your QuickCAD V4 on Windows 7, Windows 8 or Windows 10!

Copyright 2018 (c) Longbow Software

Installing 32bit AutoCAD Mechanical 2010 on Windows 7, Windows 8 and Windows 10 64bit

NOTE: This blog post specifically solves issues related to these error messages on installation…

  • “This operating system is not supported by AutoCAD Mechanical® 2010”
  • “You cannot install this product on the current operating system”
  • “You are attempting to use a 32-bit installer on a 64-bit operating system”
  • “This is a 32-bit AutoCAD Mechanical® 2010. It cannot be installed on 64-bit Windows”

Installing AutoCAD Mechanical 2010 (MDT 2010) 32bit on Windows 7, Windows 8, Windows 8.1 or Windows 10 64bit can be very easily defined in these short steps…

NOTE: These steps do not bypass normal Autodesk licensing/authorization, you should expect to use your own serial numbers in the normal way.

  1. Obtain your copy of the Longbow Converter here
  2. If you have CDs (if not check (3) below):
    1. Insert your AutoCAD MDT 2010 CD into your CDRom drive, cancel setup if it starts
    2. Next, start the Converter App
    3. Select the 1st tab in the Converter tool named “32bit AutoCAD Installer Converter
    4. Using the “…” button pick the path to your AutoCAD MDT 2013 CD
    5. Now click the “Convert” button and follow the instructions.
    6. (Skip to step 4)
  3. If you have a single self extracting exe downloaded from Autodesk called something like AutoCAD_Mech_2010_English_Win_32bit.exe
    1. Simply run the exe, it will ask to unzip to a folder inside of c:\Autodesk, make a note of the folder for later use (we’ll refer to it from here as c:\Autodesk\MDT2010), now click OK.
    2. Wait until all of the files have extracted, when they do, the AutoCAD MDT 2013 setup will automatically launch – simply close it and move to the next step.
    3. Now, start the Longbow Converter tool
    4. select the 1st tab titled “AutoCAD 32bit Installer Converter
    5. pick the c:\Autodesk\MDT2010 folder
    6. and click the “Convert…” button.
  4. Once the conversion process is complete, click the “Install/Run Setup” button to start setup.
    1. Install as normal!
  5. Windows 8, Windows 8.1 and Windows 10 users: Once the installation process is complete, go back to the Converter
    1. select the 3rd tab named “Old AutoCAD Program Reviver
    2. pick the newly installed C:\Program Files (x86)\Autodesk\AutoCAD Mechanical 2010 folder
    3. then click “Fix Old Program”
  6. Now you can happily run your AutoCAD MDT 2010 32bit on Windows 7, Windows 8 and Windows 10!

Installing AutoCAD MDT 2010 Service Pack 2

  1. Here’s sp2 – AutoCAD Mechanical 2010 sp2 – install as normal

Troubleshooting:

  1. If your installed AutoCAD is hanging on startup then read this post first AutoCAD Freezes on startup (AutoCAD visible but the menus don’t appear)
  2. if your AutoCAD hangs on startup (stuck at the “Checking License…” message, try installing the 32bit version of AutoCAD 2010 on 64bit Windows – we’ve actually found the 32bit AutoCAD 2010 running on 64bit Windows is much more stable and actually faster than the 64bit version of AutoCAD 2010.
  3. If your AutoCAD crashes while interacting with the Ribbon click here
  4. If you are unable to activate your product, or the activation process crashes:
    1. Try uninstalling the July 2014 Microsoft security update
    2. Try downgrading your Internet Explorer (IE) from version 11 to version 10 by following the instructions detailed here
  5. If you have crashing problems using the File->Open or File->Save dialogs inside of AutoCAD please read this blog entry on the File->Open or File->Save Crash in AutoCAD
  6. If your Windows hangs on startup after installing please refer to this help blog
Copyright 2017 (c) Longbow Software

Installing Autodesk Land Desktop 2006 on Windows 7, Windows 8 and Windows 10

Installing AutoCAD LDT 2006 on Windows 7, Windows 8, Windows 8.1 or Windows 10 32bit or 64bit can be very easily defined in these short steps…

IMPORTANT NOTE: Autodesk no longer supply License Activation codes for this version of AutoCAD. The best way is to transfer your existing license to the new PC but there are other options, we document them here

  1. Obtain your copy of the Longbow Converter here
  2. Start In the Converter tool
    1. Next, click the File menu’s “Backup CD to Disk
    2. Follow the prompts
  3. Once the backup is completed
    1. click the Run Old Installer button… Read and understand all the prompts before pressing OK.
    2. Once the setup starts, stop and read the next step…
  4. In the setup program, navigate through each setup dialog as normal, with these exceptions… (if you cannot move past the first screen in the setup, see Trouble Shooting below)…
    1. When you click the Install link from your setup you may see a dialog box appear saying – “This program has compatibility issues” – simply check the “Don’t show this message again” and then click the “Run the program without getting help”.
    2. When you arrive at the installation folder path setup dialog, **it’s vitally important to make sure you install to c:\ldt2006 (not C:\Program Files (x86)\Autodesk Land Desktop 2006 that is defaulted)**.
    3. If asked to reboot after the install, say NO
  5. Once installed, do not reboot, make sure you fully close the AutoCAD setup program (because the Converter is waiting for the setup program to fully close) then go back to the Converter tool, select the 3rd tab, pick the newly installed c:\ldt2006 folder and click the Fix Old Program button.
  6. Now you can run your Autodesk LDT 2006 on Windows 7, Windows 8 and Windows 10, both 32bit and 64bit.
    1. NOTE: When starting AutoCAD, if you see a warning dialog when you run saying “This program has known compatibility issues“, simply click “Don’t show this message again” and then click “Run the Program…

Troubleshooting:

– If you are unable to activate your product, or the activation process crashes immediately on startup:

– If you have crashing problems using the File->Open or File->Save dialogs inside of AutoCAD please read this blog entry on the File->Open or File->Save Crash in AutoCAD

Copyright 2017 (c) Longbow Software