Installing Mathcad 2000 Pro on Windows 7, Windows 8 and Windows 10


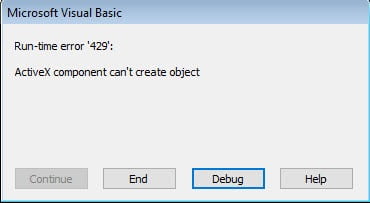
If you are having trouble installing Parametric Technology Corporation’s Mathcad 2000 Pro with errors like this…

Windows 16bit setup error - This app can't run on your PC

Windows 16bit setup error – “This app can’t run on your PC

then read on…


How to install Mathcad 2000

  1. Purchase a copy of the Longbow Reviver tool here
  2. Using Windows Explorer
    1. Copy your Mathcad 2000 CD to your hard drive, to a folder path c:\InstallCDs\Mathcad2000
  3. Start the Longbow Reviver tool
    1. select the 1st tab named “Old Installer Reviver” 
    2. using the ‘…’ button, select folder c:\InstallCDs\Mathcad2000\Mathcad. At this point, the Reviver tool should display a message telling you that setup.exe was found, if so…
    3. Click the “Fix and Run Old Installer” button
    4. Read and understand all the prompts that appear, then continue by clicking OK.
  4. Now, I know it’s unheard of these days, but at this point expect to wait up to 45 minutes for your full Mathcad 2000 setup.exe program to appear….
      1. Be patient, grab lunch maybe… 🙂
      2. Once the Mathcad 2000 Professional setup application finally displays all in Blue stop and read the next step
  5. In the setup program click through setup as normal, except when you get to the path for the installation – make sure you update the entry from c:\…\Mathcad 2000 Professional to c:\Mathcad2000 
  6. Now carry on with the install
    1. Do not reboot if prompted to do so
    2. Note, we did not Register when testing this install
  7. Once Mathcad 2000 Professional is installed
    1. Be sure to fully quit the setup
    2. go back to the Reviver tool
      1. select the 2nd tab named “Old Program Reviver” 
      2. Using the ‘…’ button, pick the newly installed c:\Mathcad2000 folder
      3. click “Fix Old Program”
      4. Say “Yes” if the Reviver tool asks if you want to re-register…
  8. Now you can happily run your Mathcad 2000 Professional on Windows 7, Windows 8 or Windows 10

MathCAD 2000 Pro Update

There is an update for MathCAD Pro 2000, here’s how to install it

  1. Download the MathCAD 2000 Pro Update from here
  2. Unzip to folder c:\InstallCDs\MathCAD2000sp
  3. Start the Longbow Reviver tool
    1. select the 1st tab named “Old Installer Reviver” 
    2. using the ‘…’ button, select folder c:\InstallCDs\MathCAD2000sp. At this point, the Reviver tool should display a message telling you that setup.exe was found, if so…
    3. Click the “Fix and Run Old Installer” button
    4. Read and understand all the prompts that appear, then continue by clicking OK.
  4. Wait up to 45 minutes for your full Mathcad 2000 setup.exe program to appear, then install as normal

Troubleshooting

Copyright 2021 (c) Longbow Software

Installing Autodesk Land Development Desktop R2 on Windows 7, Windows 8 and Windows 10

Installing AutoCAD Land Development Desktop R2 (LDDT R2 is AutoCAD 2000 based) on Windows 7, Windows 8, Windows 8.1 or Windows 10 32bit or 64bit can be very easily defined in these short steps…

NOTE: These steps do not bypass normal Autodesk licensing/authorization, you should expect to use your own serial numbers in the normal way.

A quick word of advice: best to follow the instructions below precisely and to the letter, including folder names and paths, that way you will reduce the risk of having any problems…
 
  1. Obtain your copy of the Longbow Converter here – you will need version 8.50 or newer
  2. Using Windows Explorer, copy your entire LDDT R2 2000 installation CD to your hard drive, specifically to a folder path of c:\Autodesk\lddt2000
  3. Start the Longbow Converter tool, select the 2nd tab, pick the c:\Autodesk\lddt2000 folder, and click Run. Read and understand all the prompts before pressing OK.
  4. For AutoCAD 2000 versions, the Migration Wizard almost instantly pops up, simply click Install 2000 as normal. Now, I know it’s unheard of these days, but at this point expect to wait at least 45 minutes for your Land Desktop R2 setup.exe program to fully appear. Once the setup starts, stop and read the next step…
  5. In the setup program, navigate through each setup dialog as normal, except when you get to the installation folder, **it’s vitally important to make sure you install to c:\landdt2000 (not .\Autodesk Land Development Desktop as usually prompted)**
    1. Ignore the fact the the shortcut cannot be created, you will need to create this by hand once the installation is finished.
    2. Do not reboot if prompted to do so
  6. Once installed, using Windows Explorer, navigate to c:\Autodesk\lddt2000\data and run the MDAC_TYP.exe program, with these instructions
    1. When the “Microsoft Data Access Components 2.0” license agreement pops up, if you agree with the terms, click ‘Yes’
    2. At the next dialog, simply click “Continue”
    3. When the option dialog to do a Complete install or a Custom install, click “Custom”
    4. At the next dialog, un-check “Microsoft Remote Data Services” and then click “Continue”
    5. Exit the setup when finished.
  7. Next, go back to the Converter tool, select the 3rd tab, pick the newly installed c:\landdt2000 folder and click “Fix”
  8. Now you must run your AutoCAD Land Development Desktop R2 2000 as is as a first time initialization, it will start up in raw AutoCAD mode (using Windows Explorer, simply navigate to c:\landdt2000 and double click acad.exe)
    1. If you want to startup in LDT mode, simply create a shortcut to c:\landdt2000\acad.exe and set the Target property to c:\landdt2000\acad.exe /p lddt.arg
    2. If you want to startup in Map mode, simply create a shortcut to c:\landdt2000\acad.exe and set the Target property to c:\landdt2000\acad.exe /p map.arg
  9. Now you can run your Land Desktop R2 on Windows 7, Windows 8, and Windows 10, but be sure to read the Troubleshooting guide below…

The LDT 2000 Service Pack

  1. First download the stand-alone LandDesktop R2 2.01 sp from here and save to c:\Autodesk\sp
  2. Next, start the Converter, select the 3rd tab “Old AutoCAD Program Reviver” select the c:\Autodesk\sp folder, then click Fix.
    1. If asked if this is a service pack by the Converter tool, say yes.
  3. Now run the land201.exe as normal from Windows Explorer.

Troubleshooting:

  • If you are getting an “Out of memory error” when you start a new drawing, try creating a new project, and use a previous drawing to ‘Save As’ a template for use instead.

  • If your AutoCAD 2000 setup is not starting after 45 minutes, try rebooting, then restart the steps above. If it is still failing, most likely it’s because of another application on your system which is preventing our setup routine from starting (perhaps anti-virus, or similar) – try installing AutoCAD 2000 from Windows Safe Mode


Copyright 2014 (c) Longbow Software

Installing AutoCAD 2002 Express Tools on Windows 7, Windows 8 and Windows 10

If you are having trouble installing AutoCAD 2002 Express Tools with “This app cannot run on your PC” then read on…

Installing AutoCAD 2002 Express Tools (et1-9.exe) on Windows 7, Windows 8 and Windows 8.1 32bit or 64bit can be very easily defined in these short steps.

A quick word of advice: best to follow the instructions below precisely and to the letter, including folder names and paths, that way you will reduce the risk of having any problems…

  1. Obtain your copy of the Longbow Converter here
  2. Next, make sure you have AutoCAD 2002 already installed – follow these steps Installing AutoCAD 2002 on Windows 7, Windows 8 and Windows 10
  3. Unzip this zip file to c:\Autodesk
  4. Start the Longbow Converter tool, select the 2nd tab, pick the newly created c:\Autodesk\ExpressTools2002 folder, and click Run. Read and understand all the prompts before pressing OK.
  5. Now, I know it’s unheard of these days, but at this point expect to wait at least 45 minutes for your AutoCAD 2002 Express Tools setup.exe program to fully appear. Once the setup starts, stop and read the next step…
  6. In the setup program, navigate through each setup dialog as normal, except when you get to the installation folder, **it’s vitally important to make sure you install to c:\acad2002Et (not Program Files (x86)\AutoCAD Express Tools 2002 as usually prompted)**
    1. Do not reboot if prompted to do so
  7. Now you can happily run your Express Tools inside of AutoCAD 2002, simply start AutoCAD 2002 and to use Express Tools 2002 as normal..

Troubleshooting:

  • If your Express Tools 2002 setup is not starting after 45 minutes, try rebooting, then restart the steps above. If it is still failing, most likely it’s because of another application on your system which is preventing our setup routine from starting (perhaps anti-virus, or similar) – try the same steps as above in Windows Safe Mode
Copyright 2015 (c) Longbow Software

Installing AutoCAD 2000 Express Tools Volume 9 on Windows 7, Windows 8 and Windows 10

If you are having trouble installing AutoCAD 2000 Express Tools with “This app cannot run on your PC” then read on…


Installing AutoCAD 2000 Express Tools Volume 9 (et1-9.exe) on Windows 7, Windows 8, Windows 8.1 and Windows 10 32bit or 64bit can be very easily defined in these short steps.

A quick word of advice: best to follow the instructions below precisely and to the letter, including folder names and paths, that way you will reduce the risk of having any problems…

  1. Obtain your copy of the Longbow Converter here
  2. Next, make sure you have AutoCAD 2000 already installed – follow these steps Installing AutoCAD 2000 on Windows 7, Windows 8, Windows 8.1 and Windows 10
  3. Unzip this zip file to c:\Autodesk
  4. Start the Longbow Converter tool, select the 2nd tab, pick the newly created c:\Autodesk\Express Tools 2000 Volume 9 folder, and click Run. Read and understand all the prompts before pressing OK.
  5. Now, I know it’s unheard of these days, but at this point expect to wait at least 45 minutes for your AutoCAD 2000 Express Tools setup.exe program to fully appear. Once the setup starts, stop and read the next step…
  6. In the setup program, navigate through each setup dialog as normal, except when you get to the installation folder, **it’s vitally important to make sure you install to c:\acad2000Et (not Program Files (x86)\AutoCAD Express Tools as usually prompted)**
    1. Do not reboot if prompted to do so
  7. Now you can happily run your Express Tools inside of AutoCAD 2000 running on Windows 7, Windows 8 and Windows 10 –  using Windows Explorer, simply navigate to c:\acad2000 and double click acad.exe to start AutoCAD 2000 and to use Express Tools 2000

Troubleshooting:

  • If your Express Tools 2000 setup is not starting after 45 minutes, try rebooting, then restart the steps above. If it is still failing, most likely it’s because of another application on your system which is preventing our setup routine from starting (perhaps anti-virus, or similar) – try the same steps as above in Windows Safe Mode
Copyright 2015 (c) Longbow Software

Installing Autodesk Land Desktop 2005 on Windows 7, Windows 8 and Windows 10

Installing AutoCAD LDT 2005 on Windows 7, Windows 8, Windows 8.1 and Windows 10 32bit or 64bit can be very easily defined in these short steps…

NOTE: These steps do not bypass normal Autodesk licensing/authorization, you should expect to use your own serial numbers in the normal way.

IMPORTANT NOTE: Autodesk no longer supply License Activation codes for this version of AutoCAD. The best way is to transfer your existing license to the new PC but there are other options, we document them here

  1. Obtain your copy of the Longbow Converter here
  2. Copy your LDT 2005 installation CD media to your hard drive, to a folder path c:\Autodesk\ldt2005 
    1. NOTE: If you have more LDT specific CD’s (not Survey or Civil as these are installed separately), simply copy the contents of each CD directly over the top of Disk 1, basically, overwrite all files in your previously copied c:\Autodesk\ldt2005 folder with the files from each of the CDs
  3. Next, start the Longbow Converter tool
    1. select the 2nd tab named “Old AutoCAD Installer Reviver
    2. pick the c:\Autodesk\ldt2005 folder (where you copied your LDT CDs to on your hard drive)
    3. click the Run Old Installer button.
      1. Read and understand all the prompts before pressing OK.
      2. Once the setup starts, stop and read the next step…
  4. In the setup program, navigate through each setup dialog as normal, with these exceptions… (if you cannot move past the first screen in the setup, see Trouble Shooting below)…
    1. When you click the Install link from your setup you may see a dialog box appear saying – “This program has compatibility issues” – simply check the “Don’t show this message again” and then click the “Run the program without getting help”.
    2. When you arrive at the installation folder path setup dialog, **it’s vitally important to make sure you install to c:\ldt2005 (not C:\Program Files (x86)\Autodesk Land Desktop 2005 that is defaulted)**.
    3. If asked to reboot after the install, say NO
  5. Once installed
    1. do not reboot
    2. make sure you fully close the AutoCAD setup program (because the Converter is waiting for the setup program to fully close) then
    3. go back to the Converter tool
    4. select the 3rd tab named “Old AutoCAD Program Reviver
    5. pick the newly installed c:\ldt2005 folder
    6. click the Fix Old Program button.
  6. Now you can run your Autodesk LDT 2005 on Windows 7, Windows 8 and Windows 10, both 32bit and 64bit.
    1. NOTE: When starting AutoCAD, if you see a warning dialog when you run saying “This program has known compatibility issues“, simply click “Don’t show this message again” and then click “Run the Program…

Troubleshooting:

– If you are seeing this error when running either the “Import LandXML” or “Export LandXML” commands

LandXML Export - Run-time error '429' ActiveX component can't create object

LandXML Export – Run-time error ‘429’ ActiveX component can’t create object

then LDT 2005 Fixed VBA Modules into the same folder as your acad.exe (using the instructions above, it should be c:\ldt2005)

– If you are unable to activate your product, or the activation process crashes immediately on startup:

– If you have crashing problems using the File->Open or File->Save dialogs inside of AutoCAD please read this blog entry on the File->Open or File->Save Crash in AutoCAD

Copyright 2023 (c) Longbow Software