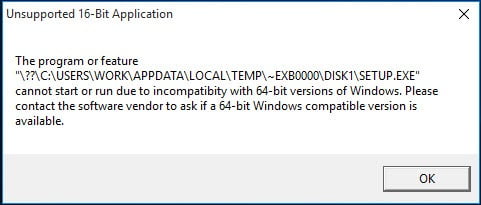
Installing Autodesk Mechanical Desktop R4 on Windows 11 is not normally possible, you will run into lots of problems including the error message shown below…

Windows 16bit setup error – This app can’t run on your PC
The following document will walk you through how to install your Autodesk Mechanical Desktop R4 (otherwise known as MDT 4 and built on the AutoCAD 2000 platform) on Windows 11 32bit or 64bit…
Ransomware Protection Windows 11 and AutoCAD
Windows 11 comes with a Ransomware Protection which includes Controlled Folder Access. Controlled folder access blocks applications from writing to your Documents, Pictures, Videos, Music, Public and Favorites folders. AutoCAD versions all the way to AutoCAD 2021 write to certain user Public folders and are therefore blocked by this feature. This can cause issues with all sorts of things including activating your AutoCAD license and even running AutoCAD. Ransomware Protection is an important feature of Windows 11 but it will affect your AutoCAD unless you allow AutoCAD and its dependent applications access to the controlled folders.
How to install AutoCAD MDT R4 (2000)
A quick word of advice: please follow the instructions below precisely as documented including using the same folder names and paths. This will significantly reduce the risk of having any problems…

- If you don’t yet have a copy of the Longbow Converter App you can purchase it here or click on the download link we sent you via email in order to download the Converter App to your PC.
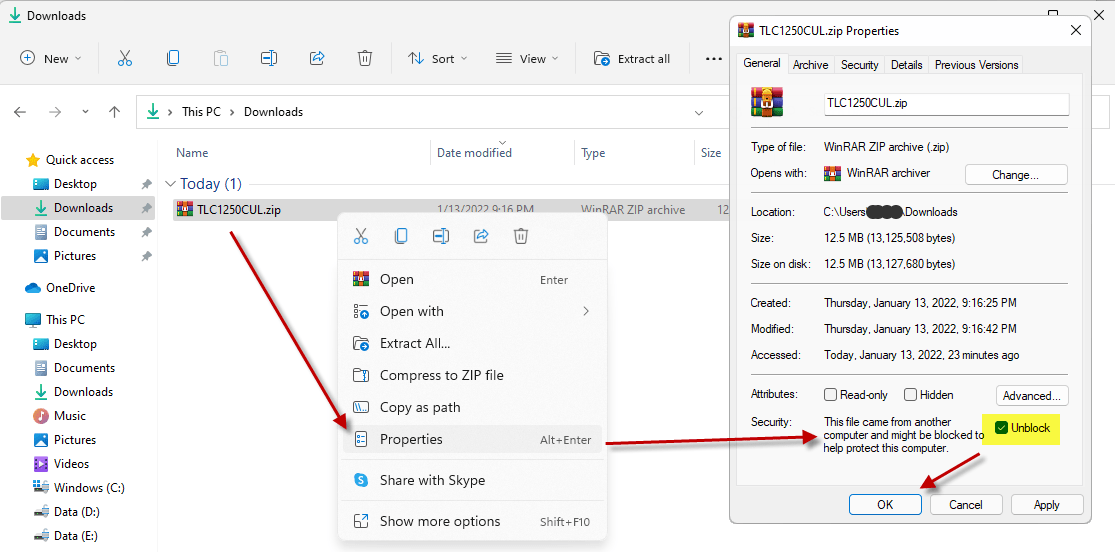
- Before installing the Converter App, make sure the files downloaded from our site are not blocked by Windows SmartScreen… Windows 11 is finicky, click the TLC zip first to make sure it’s fully selected then Right+click the file and select Properties. Be sure to check the Unblock checkbox as shown below and Click OK…

- Double click the zip file to open it and install the TLC application as normal. By the way, TLC stands for The Longbow Converter
- Start the Longbow Converter tool
- Insert your AutoCAD CD into your CDRom drive
- Select the 2nd tab named “Old AutoCAD Installer Reviver“
- Using the “…” button, pick your AutoCAD CD
- Click “Run Old Installer”
- Read and follow all the prompts
- Once the AutoCAD setup starts, stop and read the next step…
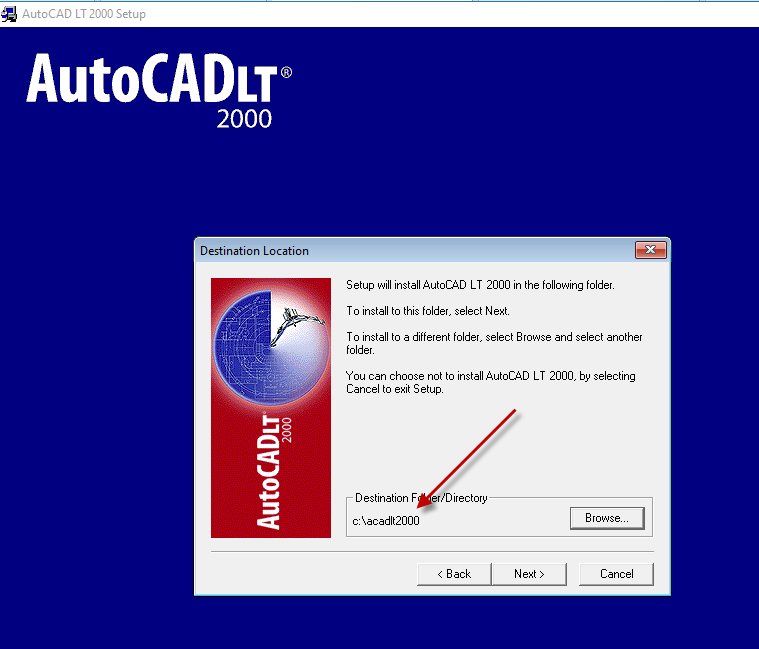
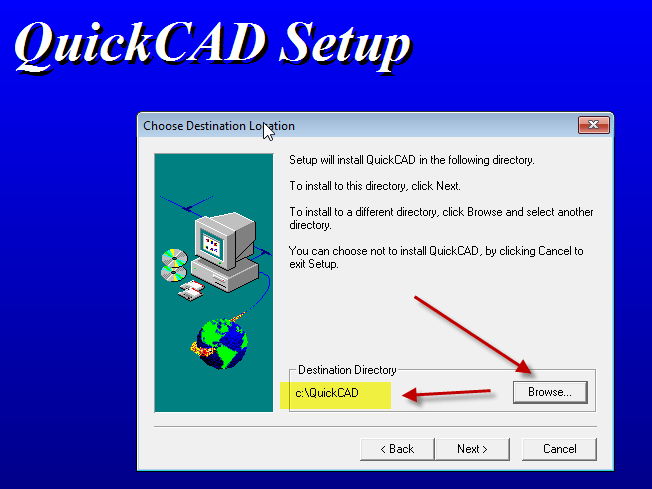
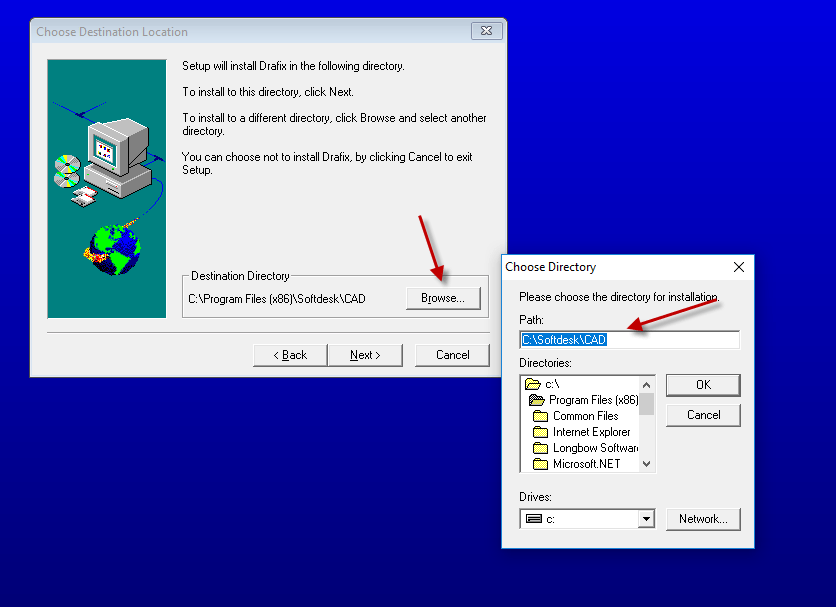
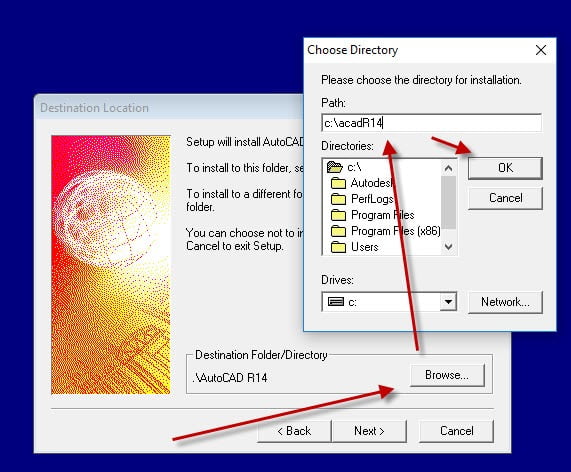
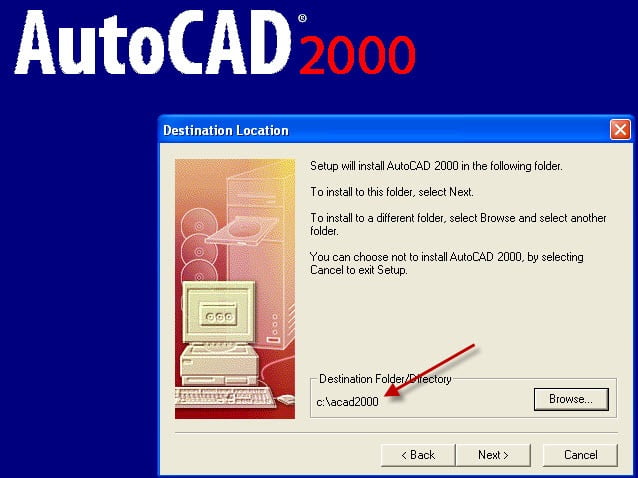
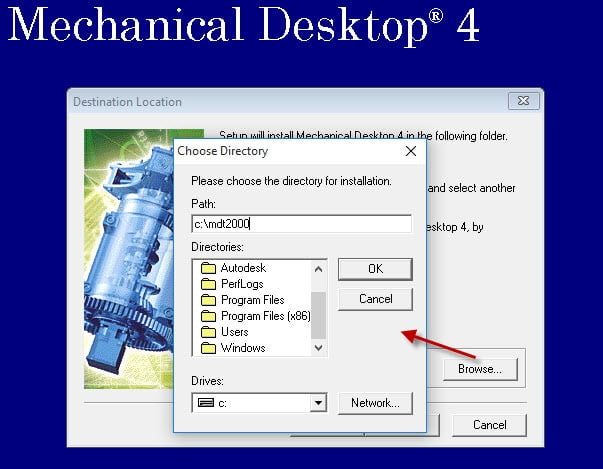
- In the setup program, navigate through each setup dialog as normal, except when you get to the installation folder, **it’s vitally important to make sure you install to c:\mdt2000 (not .\MDT as usually prompted)**
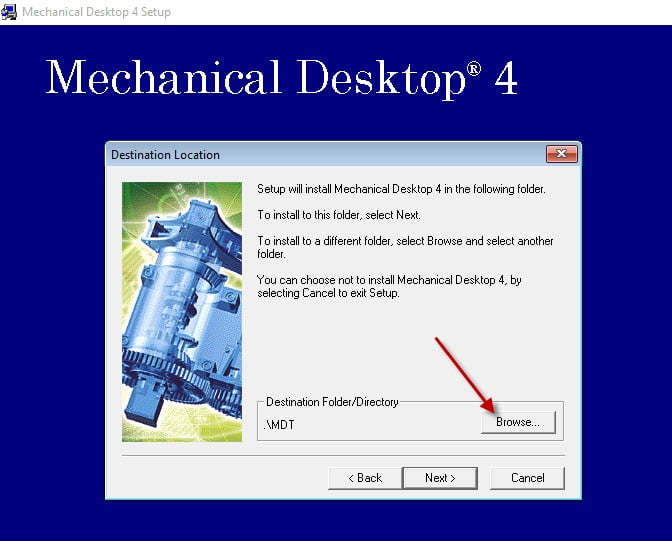
MDT 4 select the Browse button and update path to c:\mdt2000
- Now carry on with the install, please read all of the following tips while your installation is running so that you are prepared…
- Do not reboot once the install is complete.
- Ignore any errors related to not being able to create the shortcut folder “Mechanical Desktop 4”, you will have to create a shortcut on your computer Desktop pointing to your c:\mdt2000\acad.exe by hand.
- If you see errors stating errors with objectdbx.z or dao2535.tlb – please reboot your machine and re-do all of the steps above.
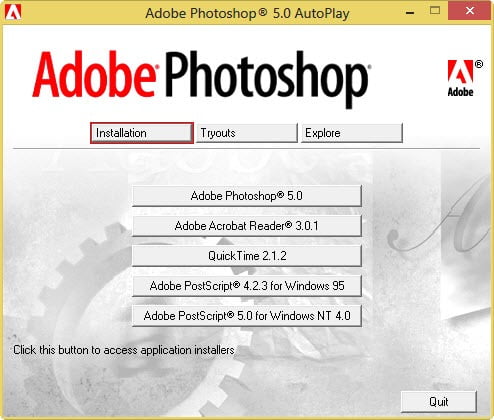
- Once you click “OK” to setup not being able to create your shortcut folder “Mechanical Desktop 4” – setup may now try to install Acrobat Reader 3.01. If this happens, you will see a blue Mechanical Desktop 4 screen with nothing on it, it will sit there for maybe 60 minutes, just let it do its thing and be patient. Eventually, you will see the Acrobat setup appear, install accepting all defaults.
- When the MDT 4 setup asks if you want to “Install the Mechanical Desktop Migration Assistant” say ‘No‘
- Once the setup has completed…
-
- Do not reboot if asked to do so
- Make sure to fully close the setup program when the installation is complete.
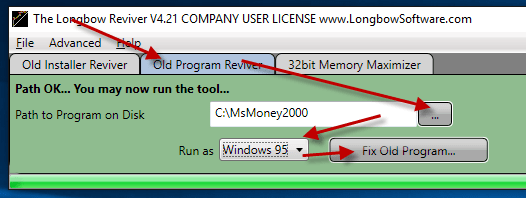
- Back in the Converter app and make sure it’s completed the final stage of processing using the “Old AutoCAD Program Reviver” tab and that SUCCESS!! is displayed
-
- Finally, reboot your PC.
- Now you are ready to run your AutoCAD, simply run c:\mdt2000\acad.exe using Windows Explorer.
- If you find that you are running in raw AutoCAD mode, to enable your Mechanical Desktop features, carry out these next steps, either…
- Add a shortcut (recommended) to c:\mdt2000\acad.exe making sure that the Target Property of the shortcut is set to (including quotes) “C:\mdt2000\acad.exe” /p “C:\mdt2000\desktop\desktop.arg” and the Start In Property is set to the same path as the .arg file e.g.
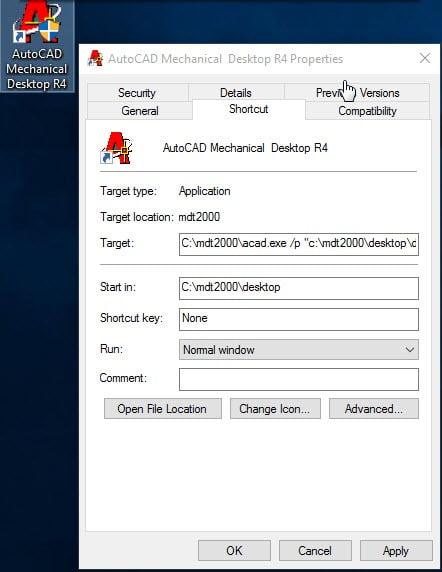
Creating a shortcut to Mechanical R4 making sure the Startin property points to where the .arg file resides
- For the Power Packs use a new shortcut with the Target set to either
- “C:\mdt2000\acad.exe” /p “C:\mdt2000\acadm\mdtpp.arg”
- “C:\mdt2000\acad.exe” /p “C:\mdt2000\acadm\acadmpp.arg”
…with both Shortcut Start In: properties set to and the C:\mdt2000\acadm
- “C:\mdt2000\acad.exe” /p “C:\mdt2000\acadm\mdtpp.arg”
- For the Power Packs use a new shortcut with the Target set to either
- or update your AutoCAD support path by hand…
- At the AutoCAD Command line, type the command ‘Preferences’, add new Support path folders c:\mdt2000\acadm and then also c:\mdt2000\acadm\support, now click ‘Apply’ and then ‘OK’ out of the dialog.
- Next, restart AutoCAD.
- When you are back in AutoCAD, type ‘Menuload’ at the command line, click browse, then navigate to C:\mdt2000\acadm\support, change the file filter at the bottom to *.mnu, then open acadm.mnu, finally click Load, then pick Close.
- Now restart AutoCAD
- Add a shortcut (recommended) to c:\mdt2000\acad.exe making sure that the Target Property of the shortcut is set to (including quotes) “C:\mdt2000\acad.exe” /p “C:\mdt2000\desktop\desktop.arg” and the Start In Property is set to the same path as the .arg file e.g.
- Now you can happily run your Autodesk Mechanical Desktop 4 – but we do recommend you install the following Service Packs…
Installing AutoCAD 2000 Service Pack 1
- Obtain AutoCAD 2000 sp1
- Unzip your newly downloaded sp to folder path c:\Autodesk\sp
- Start the Converter, select the 2nd tab named “Old AutoCAD Installer Reviver“,
- pick the c:\Autodesk\sp\AutoCAD 2000 sp1 folder and click ‘Run Old Installer’
- Wait for the setup to appear, it could take up to 45 minutes, then install as normal
Installing AutoCAD 2000 Service Pack 2
- Obtain AutoCAD 2000 sp2
- Unzip your newly downloaded sp to folder path c:\Autodesk\sp
- Start the Converter, select the 2nd tab named “Old AutoCAD Installer Reviver“,
- pick the c:\Autodesk\sp\AutoCAD 2000 sp2 folder and click ‘Run Old Installer’
- Wait for the setup to appear, it could take up to 45 minutes, then install as normal.
Installing AutoCAD 2000 Service Pack 3
- Obtain the AutoCAD MDT R4 sp 3
- Unzip your newly downloaded sp to folder path c:\Autodesk\sp
- Start the Converter, select the 2nd tab named “Old AutoCAD Installer Reviver“,
- pick the c:\Autodesk\sp\AutoCAD 2000 sp3 folder and click ‘Run Old Installer’
- Wait for the setup to appear, it could take up to 45 minutes, then install as normal.
Installing AutoCAD 2000 Service Pack 4a
- Obtain the AutoCAD MDT R4 sp 4a
- Unzip your newly downloaded sp to folder path c:\Autodesk\sp
- Start the Converter, select the 2nd tab named “Old AutoCAD Installer Reviver“,
- pick the c:\Autodesk\sp\AutoCAD 2000 sp4 folder and click ‘Run Old Installer’
- Wait for the setup to appear, it could take up to 45 minutes, then install as normal.
Troubleshooting
- If your MDT R4 (AutoCAD 2000) setup is not starting after 45 minutes
- try rebooting, then restart the steps above. If it is still failing, most likely it’s because of another application on your system which is preventing our setup routine from starting (perhaps anti-virus, or similar) – try installing AutoCAD 2000 from Windows Safe Mode
- Plotting – if you are having plotting issues, either
- If you are getting a WinHelp() error when pressing F1 to try and access the Help system then simply install the WinHelp (WinHlp32.exe) module from Microsoft
- If you have crashing problems using the File->Open or File->Save dialogs inside of AutoCAD please read this blog entry on the File->Open or File->Save Crash in AutoCAD