If you are trying to install Borland Delphi 3 on Windows 7, 8 or Windows 10 64bit you are probably running into one of these problems…

This app can’t run on your PC. To find a version that runs with your PC check with the publisher.
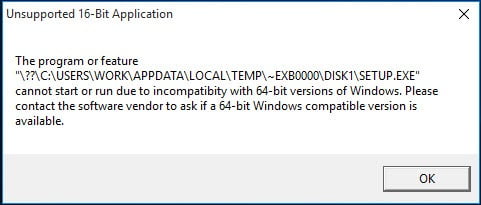
Unsupported 16-bit Application – the program or feature cannot start or run due to incompatibility with 64-bit versions of Windows
Luckily, the Longbow Reviver tool can solve this, here’s what you need to do:
- Obtain your copy of the Longbow Reviver tool here
- Backup your Borland Delphi 3 CD to your Desktop, in a “Delphi 3” folder
- Next, start the Longbow Reviver tool and select the “Old Installer Reviver” tab
- Using the “…” button select the path to the Desktop\Delphi 3\install folder…

Selecting the Backup Copy of the Delphi 3 CD on your hard drive
- Once you have that selected, click OK and then pick the “Fix and Run Old Installer” button.
- Now, be patient, the process for initializing the Delphi 3 setup may take over an hour…
- Look out for a folder called _ISTMP0.DIR being created in the install folder, if it’s not there in an hour, restart your computer and try again…
- The _ISTMP0.DIR should slowly fill with about 21 files before the setup appears.
- Using the “…” button select the path to the Desktop\Delphi 3\install folder…
- Once your Delphi 3 setup appears
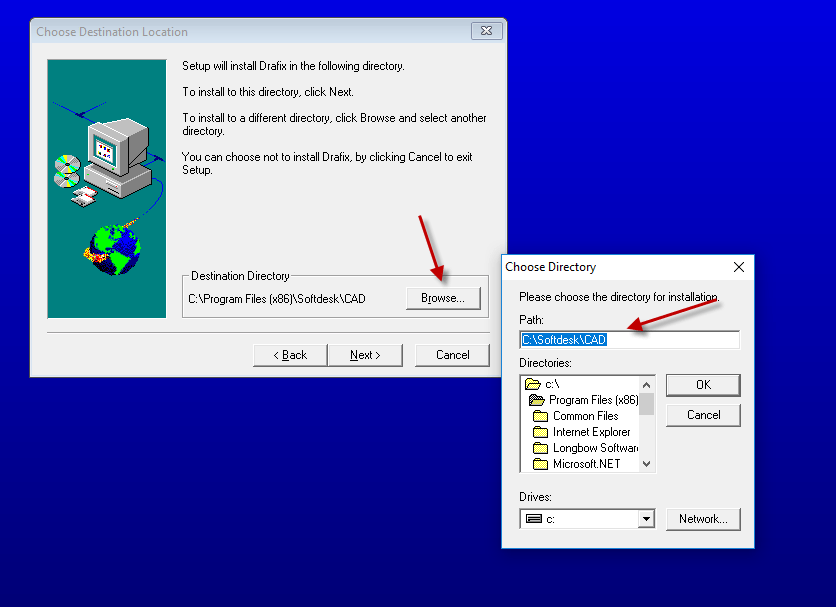
- step through the setup dialogs as normal until you get to the “Select Directories” dialog
- Here, make sure you change the Root folder to c:\Borland (instead of c:\Program Files (x86)\Borland)
e.g.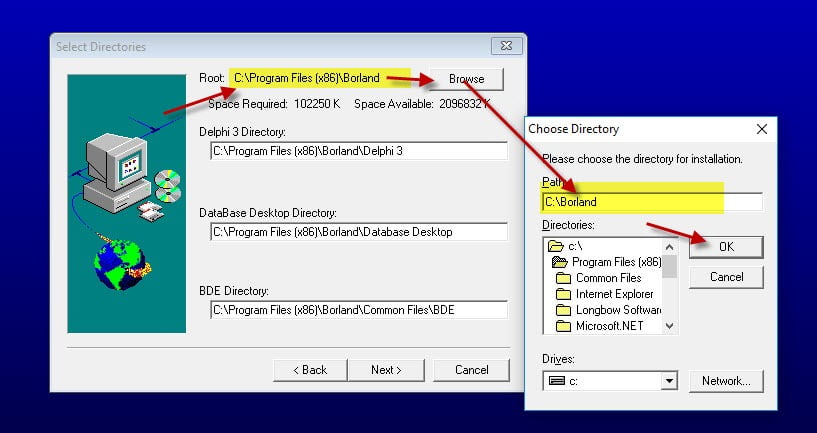
Update the Borland Root pathto c:\Borland
- Make sure they are setup like this…
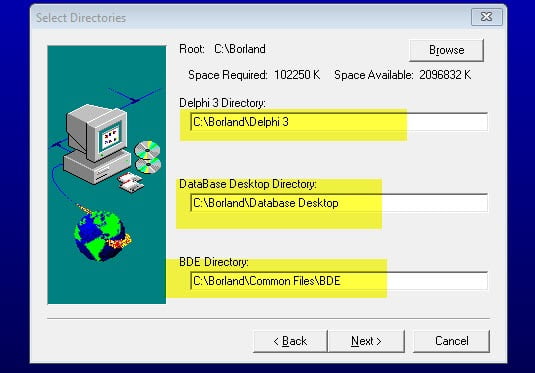
Updated the Borland Root path
- Now carry on and install as normal until complete
- Be patient, it takes a while to complete…
- Once the install is complete
- make sure the Delphi 3 setup is shutdown.
- Go back to the Reviver tool and select the 2nd tab named “Old Program Reviver“
- Using the ‘…’ button, pick the newly installed c:\Borland folder
- Then pick the “Run Old Program” button
- Now your Delphi 3 should be up and running…
Copyright 2017 (c) Longbow Software