NOTE: We currently only support US unlocked versions of 2004 on 64bit OS. European or locked US support 2004 is limited only to 32bit Windows 7, 8 and Windows 10.
Installing AutoCAD LT 2004 on Windows 7, Windows 8, Windows 8.1 and Windows 10 32bit or 64bit can be very easily defined in these short steps…
NOTE: These steps do not bypass normal Autodesk licensing/authorization, you should expect to use your own serial numbers in the normal way.
- Obtain your copy of the Longbow Converter here
- Copy your AutoCAD LT 2004 CD to your hard drive, to a folder path c:\Autodesk\acadlt2004
- Start the Longbow Converter tool
- Select the 2nd tab ‘Old AutoCAD Installer Reviver‘
- Pick the c:\Autodesk\acadlt2004 folder
- click the ‘Run’ button.
- Read and understand all the prompts before pressing OK. Once the setup starts, stop and read the next step…
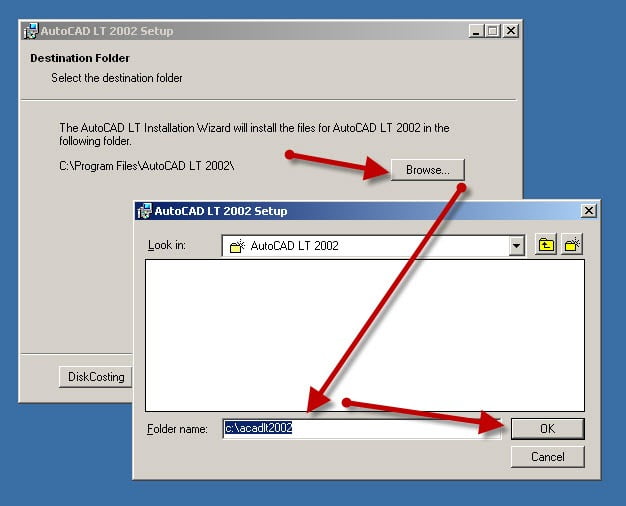
- In the setup program, navigate through each setup dialog as normal, except when you get to the installation folder, **it’s vitally important to make sure you install to c:\acadlt2004 (not Program Files (x86)\AutoCAD LT 2004**
- If you see an error in install “.NET Runtime Optimization Service has stopped working” – simply ignore by clicking the “Close Program” button
- Do not reboot if asked to do so
- Once installed
- go back to the Converter tool, select the 3rd tab ‘Old AutoCAD Program Reviver‘,
- pick the newly installed c:\acadlt2004 folder
- click the ‘Fix Old Program‘ button.
- Now you can run happily your AutoCAD LT 2004 in Windows 7, Windows 8 or Windows 10 both 32bit and 64bit.
- NOTE: If you see a warning dialog when you run saying “This program has known compatibility issues”, simply click “Don’t show this message again” and then click “Run the Program…”
Installing AutoCAD LT 2004 Sp1a
To install the sp for your AutoCAD…
- Download your AutoCAD LT 2004 Sp1a
- Copy the service pack exe installer to folder path c:\Autodesk\sp
- Start the Converter, select the 3rd tab, pick the c:\Autodesk\sp folder and click Fix.
- Now you can run the service pack exe installer from Windows explorer as normal
Troubleshooting:
If you have crashing problems using the File->Open or File->Save dialogs inside of AutoCAD please read this blog entry on the File->Open or File->Save Crash in AutoCAD
Copyright 2016(c) Longbow Software