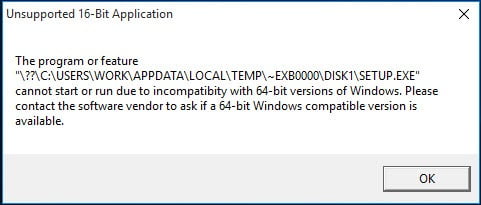
These instructions solve issues around installing/running your old AutoCAD Mechanical 2011 on newer versions of 64bit Windows 7, Windows 8 and Windows 10. Some common issues are error messages like these
- “This operating system is not supported by AutoCAD® Mechanical 2011”
- “You cannot install this product on the current operating system”
- “You are attempting to use a 32-bit installer on a 64-bit operating system”
- “This is a 32-bit AutoCAD® Mechanical 2011. It cannot be installed on 64-bit Windows”
You can automatically solve these problems using our Longbow Converter App, it fixes and manages the AutoCAD Mechanical 2011 installation so that you can be up and running again… Follow these instructions:
How to install AutoCAD MDT 2011

- Obtain your purchased copy of the Longbow Converter here
- Start the Converter App and note the user interface
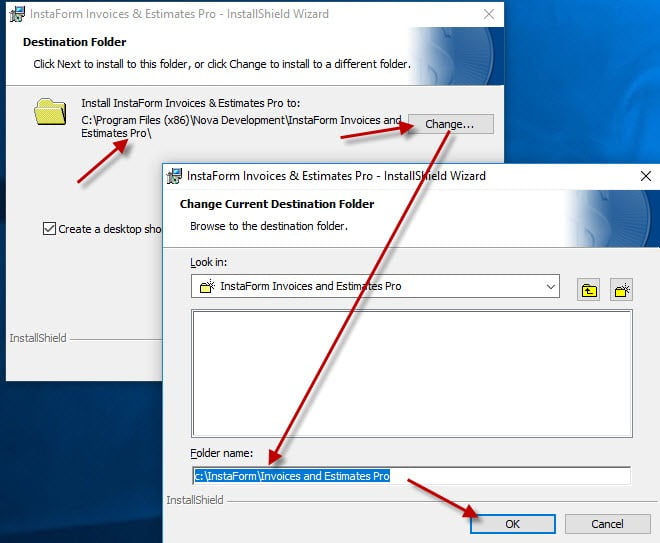
- Select the 1st tab named “AutoCAD 32bit Installer Converter“
- Using the “. . .” button, selection your AutoCAD installation CD
- Next, click the “Convert“ button and follow instructions
- Once the conversion process is complete
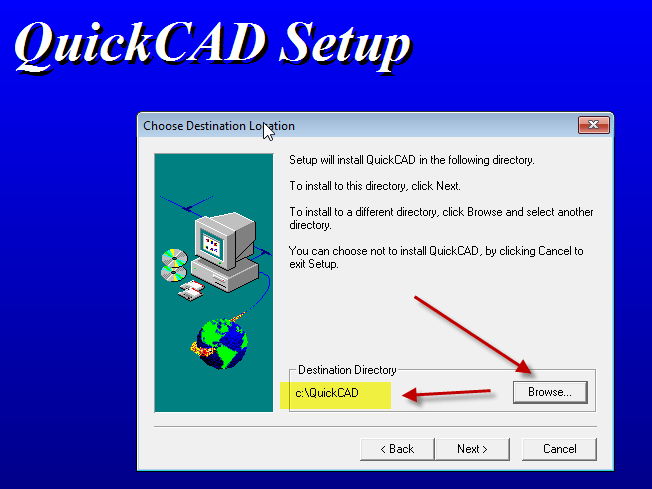
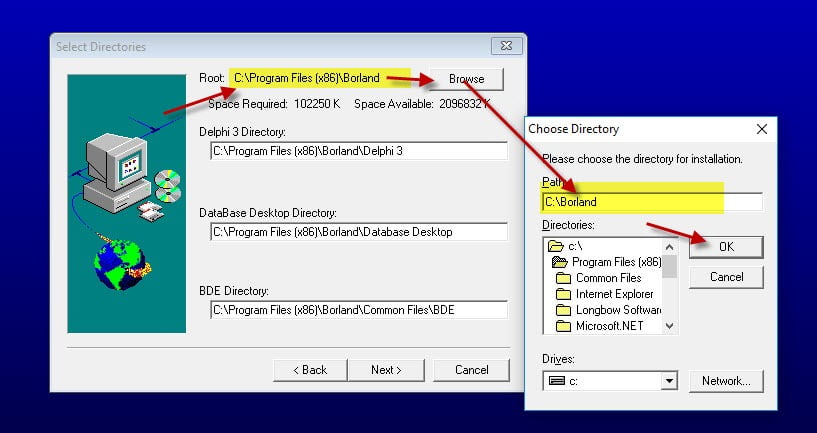
- click Install/Run Setup to start setup
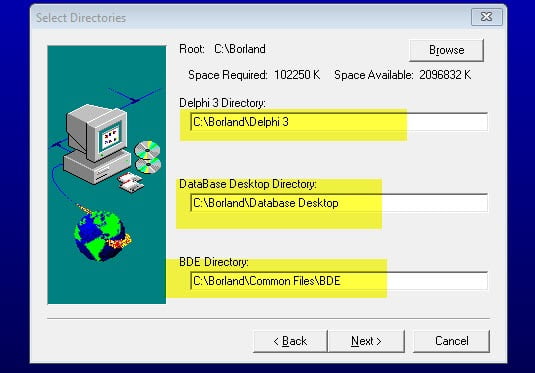
- Simply install as normal, remembering to…
- Close the setup program when the installation is complete.
- Now back in the Converter app and make sure it’s completed the final stage of processing using the “Old AutoCAD Program Reviver” tab
- Now run your AutoCAD as normal
- NOTE: We highly recommend you install the service packs below
Installing AutoCAD MDT 2011 Service Packs
We recommend that you download and install the latest Service Packs from Autodesk which can be found here
AutoCAD Mechanical 2011 has 2 updates, you must install Update 1.1 first then Update 2… Here are the instructions for installing the AutoCAD MDT 2011 sp/updates/service packs
Troubleshooting
– If your AutoCAD crashes while interacting with the Ribbon click here
– If you are unable to activate your product, or the activation process crashes:
- Try uninstalling the July 2014 Microsoft security update
- Try downgrading your Internet Explorer (IE) from version 11 to version 10 by following the instructions detailed here
– If you have crashing problems using the File->Open or File->Save dialogs inside of AutoCAD please read this blog entry on the File->Open or File->Save Crash in AutoCAD Copyright 2020 (c) Longbow Software