AutoCAD Map 2000i users are very used to the software package and cannot do without it. With the latest hardware and required move to new Windows versions, you will inevitably run into problems either installing or running your AutoCAD again – a common fault is the error dialog stating “Runtime Error!”
How to install AutoCAD Map 2000i

- If you have an existing faulty Map 2000i installation, uninstall it.
- Next, obtain your purchased copy of the Longbow Converter here
- Start In the Converter App and note the user interface
- Insert your AutoCAD CD into your computer
- Start the Longbow Converter tool
- Select the 2nd tab named “Old AutoCAD Installer Reviver“
- Using the “…” button pick your AutoCAD CD
- Click “Run Old Installer” and follow the Converter’s instructions.
- Once the AutoCAD Map 2000i setup starts, stop and read the next step…
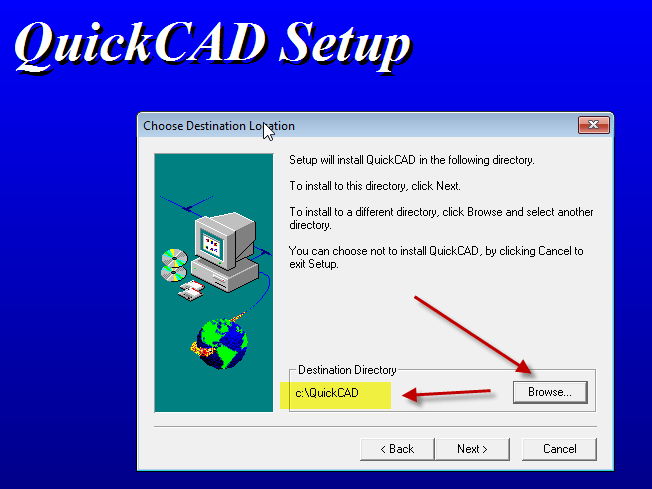
- In the setup program, navigate through each setup dialog as normal, except when you get to the installation folder, **it’s vitally important to make sure you install to c:\acad2000i (not Program Files (x86)\AutoCAD Map 2000i as usually prompted by default)**
- Once installed
- do not reboot if prompted to do so.
- Fully close the AutoCAD setup application
- Finally, let the Converter App finish processing
- Now, you can happily run your AutoCAD 2000i on Windows 7, Windows 8 and Windows 10!
Installing the ER Mapper Imagery Plugin for AutoCAD 2000i
If you are having problems installing the
ER Mapper Imagery Plugin for AutoCAD 2000i, try this…
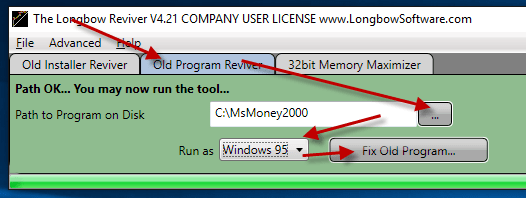
- Start In the Converter App again\
- Select the 3rd tab named “Old AutoCAD Program Reviver”
- Using the “…” button pick the folder where your ACAD2000_ECW_Plugin exe is
- Now hit “Fix Old Program“
- Once the Converter app is complete, run the
ACAD2000_ECW_Plugin exe as normal
Troubleshooting
- If you have crashing problems using the File->Open or File->Save dialogs inside of AutoCAD please read this blog entry on the File->Open or File->Save Crash in AutoCAD
Copyright 2019 (c) Longbow Software